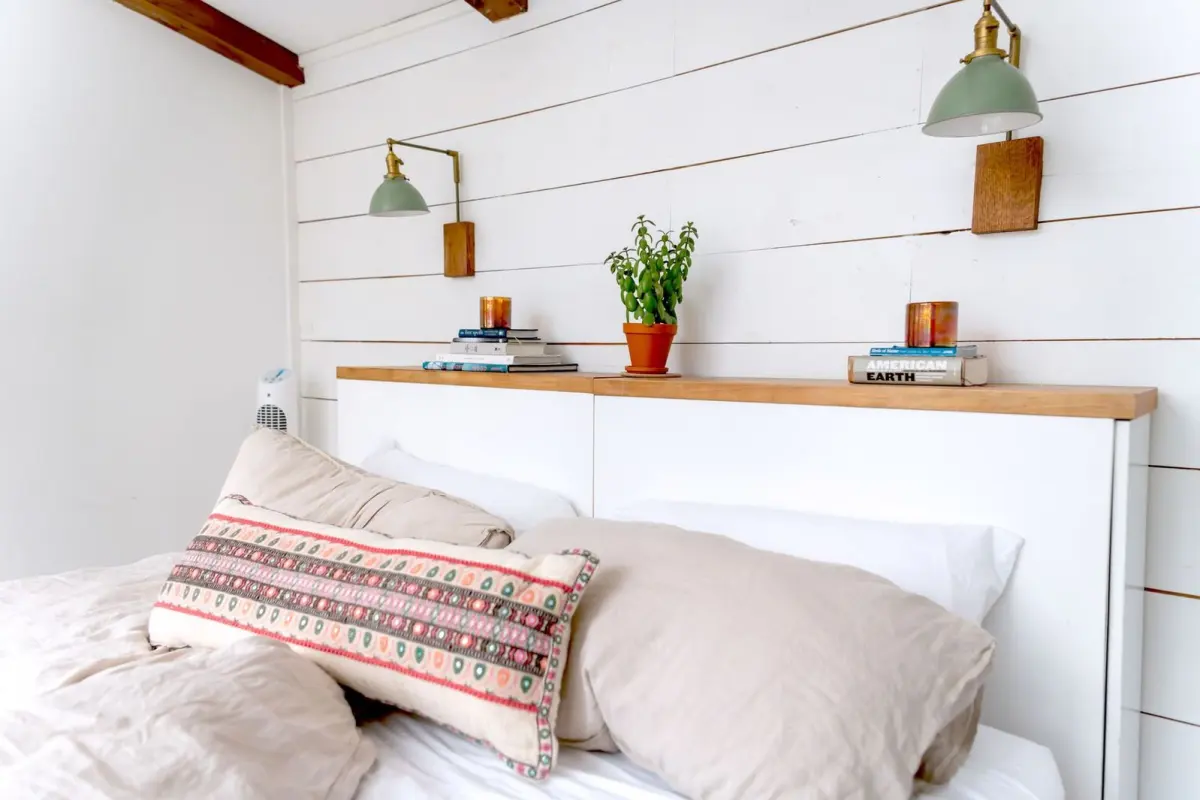
Staring at a flat, boring wall and wondering if you can pull off a DIY shiplap wall yourself? You can: mark the studs, level the first board, and nail up painted boards row by row.
This walkthrough sits within the wider set of home improvement projects that refresh a room without a contractor.
| Item | Value |
|---|---|
| Plywood for a wall eight feet high and 10 feet long | 80 square feet |
| One standard 4 X 8 plywood sheet | 32 square feet |
| Recommended plywood | ¾-inch AC |
| Ripped board width | 5⅞ inches |
| Spacer between boards | ⅛-inch |
| Standard wall stud spacing | 16 inches or 24 inches |
These figures come from Bob Vila’s shiplap installation guide. Measurements and product sizes can change, so check the source and your own wall before you rely on them.
Which kind of shiplap should you use?
Before you buy anything, choose the type of board. The look is similar, but the installation and the cost are not.
- Real shiplap: the boards have no tongue and groove and sit flush against one another, which gives a gap of 3/8″ that can be changed to have no reveal, according to a lumber retailer’s tutorial.
- Nickel gap: the same tutorial describes it as a tongue and groove moulding with an ⅛” small gap between the front faces of the boards.
- Plywood strips: Bob Vila’s guide says you can simply (and inexpensively) cut uniform boards from finish-grade plywood and then paint them.
If you are new to this, a DIY writer at Real Homes recommends nickel gap tongue-and-groove shiplap for a totally doable wall paneling project. The boards snap together, so the spacing takes care of itself.
Tools and materials for a shiplap wall
The tool list is short, and you may already own most of it. Between the sources, the common items are:
- Measuring tape, pencil and chalk line
- Stud finder and a standard level
- Miter saw, circular saw or jigsaw
- Nail gun (a finish nailer or brad nailer) or a hammer
- Construction adhesive and a caulk gun
- Wood filler or spackle, paintable caulk and a putty knife
- Paint, brush and roller, if you are painting
- Safety goggles, a dust mask and hearing protection
Wear goggles and a dust mask before cutting and sanding wood, as Bob Vila’s guide advises. Hearing protection is wise too, because some power saws are loud.
How much material do you need to buy?
Start by measuring the wall height and length, then multiply them to get the area. In Bob Vila’s example, a wall eight feet high and 10 feet long needs 80 square feet of plywood. A standard 4 X 8 sheet holds 32 square feet, so that wall takes three sheets.
Buy a little extra. It gives you wiggle room if you make a cutting error.
If you buy ready-made tongue-and-groove boards instead, the Baird Brothers tutorial suggests dividing the wall height by the width of the board to see how many rows you need.
For plywood, the same Bob Vila guide recommends ¾-inch AC plywood. The “A” face is the best quality and is the side that shows, while the “C” side faces the wall.
Rip each sheet into boards 5⅞ inches wide. Snap a chalk line and cut along the outside of it, because the saw blade eats up ⅛-inch of the plywood.
Step-by-step: how to install the boards
Shiplap goes up much like plank flooring, working from one side of the wall to the other. Follow the order below.
- Clear the wall. Baird Brothers says to remove pictures, outlet covers, switchplates and mouldings, and to turn off the power before adjusting any outlets.
- Let the wood acclimate. A manufacturer’s sponsored video on a trade site says to leave the boards for several days in the room where they will be installed.
- Mark the studs. Use a stud finder, then draw level vertical lines up the wall so you can still find the studs once the boards cover them.
- Level the first row. Most walls are not straight or level, so check the first board even if the baseboard looks right.
- Fasten the boards. Nail into the studs, using two nails per stud to stop the wood from moving or cupping.
- Stagger the seams. Work up the wall, and make sure the boards always meet on a stud.
Starting at the bottom and levelling
The Real Homes writer usually starts at the bottom because it is easier to keep a board level while your feet are on solid ground. She sees no right or wrong choice, though she stresses that the first row must be level.
If a gap shows between the shiplap and the floor or baseboard, fill it later with spackle or painter’s caulk. The writer’s other tip is to nail along the lip of tongue-and-groove boards, because the nails end up hidden.
Spacing, adhesive and nails
With real shiplap, put ⅛-inch spacers between the boards before you nail, as Bob Vila’s guide describes. Wood expands with humidity and temperature changes, so a small expansion gap is a good idea.
The trade-site video also says to apply a bead of construction adhesive to the back of each board and to drive 2-inch trim nails at each stud, per its instructions. Dry fit each piece before you apply adhesive, as Baird Brothers recommends.
Cuts, outlets and the last row
At the end of a row, cut the last board to fit and use the cut-off end to start the next row. This saves waste and gives a staggered effect, according to Bob Vila.
For outlets and switches, a jigsaw gives a smoother cut that needs less sanding, says Baird Brothers. The final row will likely need a lengthwise cut, so measure the gap in several places in case the ceiling is not level, per the trade-site video.
Painting and finishing touches
You can paint before or after hanging the boards. With plywood strips, Bob Vila’s guide paints them first, covering the faces, edges and ends with good quality interior paint.
With tongue-and-groove boards, paint the exposed lip after the first row goes up, because it is easier than reaching the gap with a small brush at the end. The Real Homes writer calls this a time saver, not a required step.
Once every board is up, follow this finishing order from Baird Brothers:
- Put the mouldings back, starting with doorways, then baseboard and crown.
- Fill nail holes with wood filler, let it dry and sand lightly.
- Run paintable caulk along seams between the shiplap and the mouldings, then wipe away the excess with a wet cloth.
- Paint the wall.
If you want a refresher on brushes, rollers and prep, see how to paint a room. If a full build feels like too much, how to install peel and stick wallpaper covers a lighter way to add pattern.
Going vertical
For vertical shiplap, install full-length furring strips every 24 inches first, then hang the boards the same way, according to the trade-site video. Remember that this is a manufacturer’s sponsored content, so treat it as one method among several.
Frequently asked questions
Do I really need to find the studs?
Show answer
Yes. The boards are nailed into the studs, and it is much easier to find them through bare drywall than through the finished boards, as the Real Homes writer points out.
Can I make shiplap from plywood?
Show answer
Yes. Bob Vila’s guide uses ¾-inch AC plywood ripped into boards, which it describes as an inexpensive route to the look.
Should I start at the top or the bottom of the wall?
Show answer
Either can work. The Real Homes writer starts at the bottom, and her main rule is to make sure the first row is level.
Why leave a gap between boards?
Show answer
Wood tends to expand with humidity and temperature fluctuations, so Bob Vila’s guide suggests leaving an expansion gap. It also uses ⅛-inch spacers for a uniform gap between the boards.